Steigung von SRM Wireless Powermeter mit Garmin Edge 500 updaten

Um eine möglichst genaue Leistungsmessung eines Fahrradtrainings zu gewährleisten, müssen zwei Dinge sichergestellt sein:

  1. Korrekte Erfassung der Nullstelle
  2. Korrekte Einstellung der spezifischen Steigung

Den ersten Punkt sollte man vor jedem Training abgleichen. Bei Garmin heißt das entsprechende Menü “Kalibrierung”, auch wenn das eigentlich nicht ganz präzise ist. Den zweiten Punkt muss man nur bei Veränderungen des Powermeters (bspw. andere Kettenblätter, veränderte Kurbellänge) bzw. in längeren Zeitabständen berechnen und einstellen. Zur Berechnung der Steigung benötigt man ein Prüfgewicht von mindestens 20kg Gewicht und führt damit den unter diesem Link beschriebenen Prozess durch.

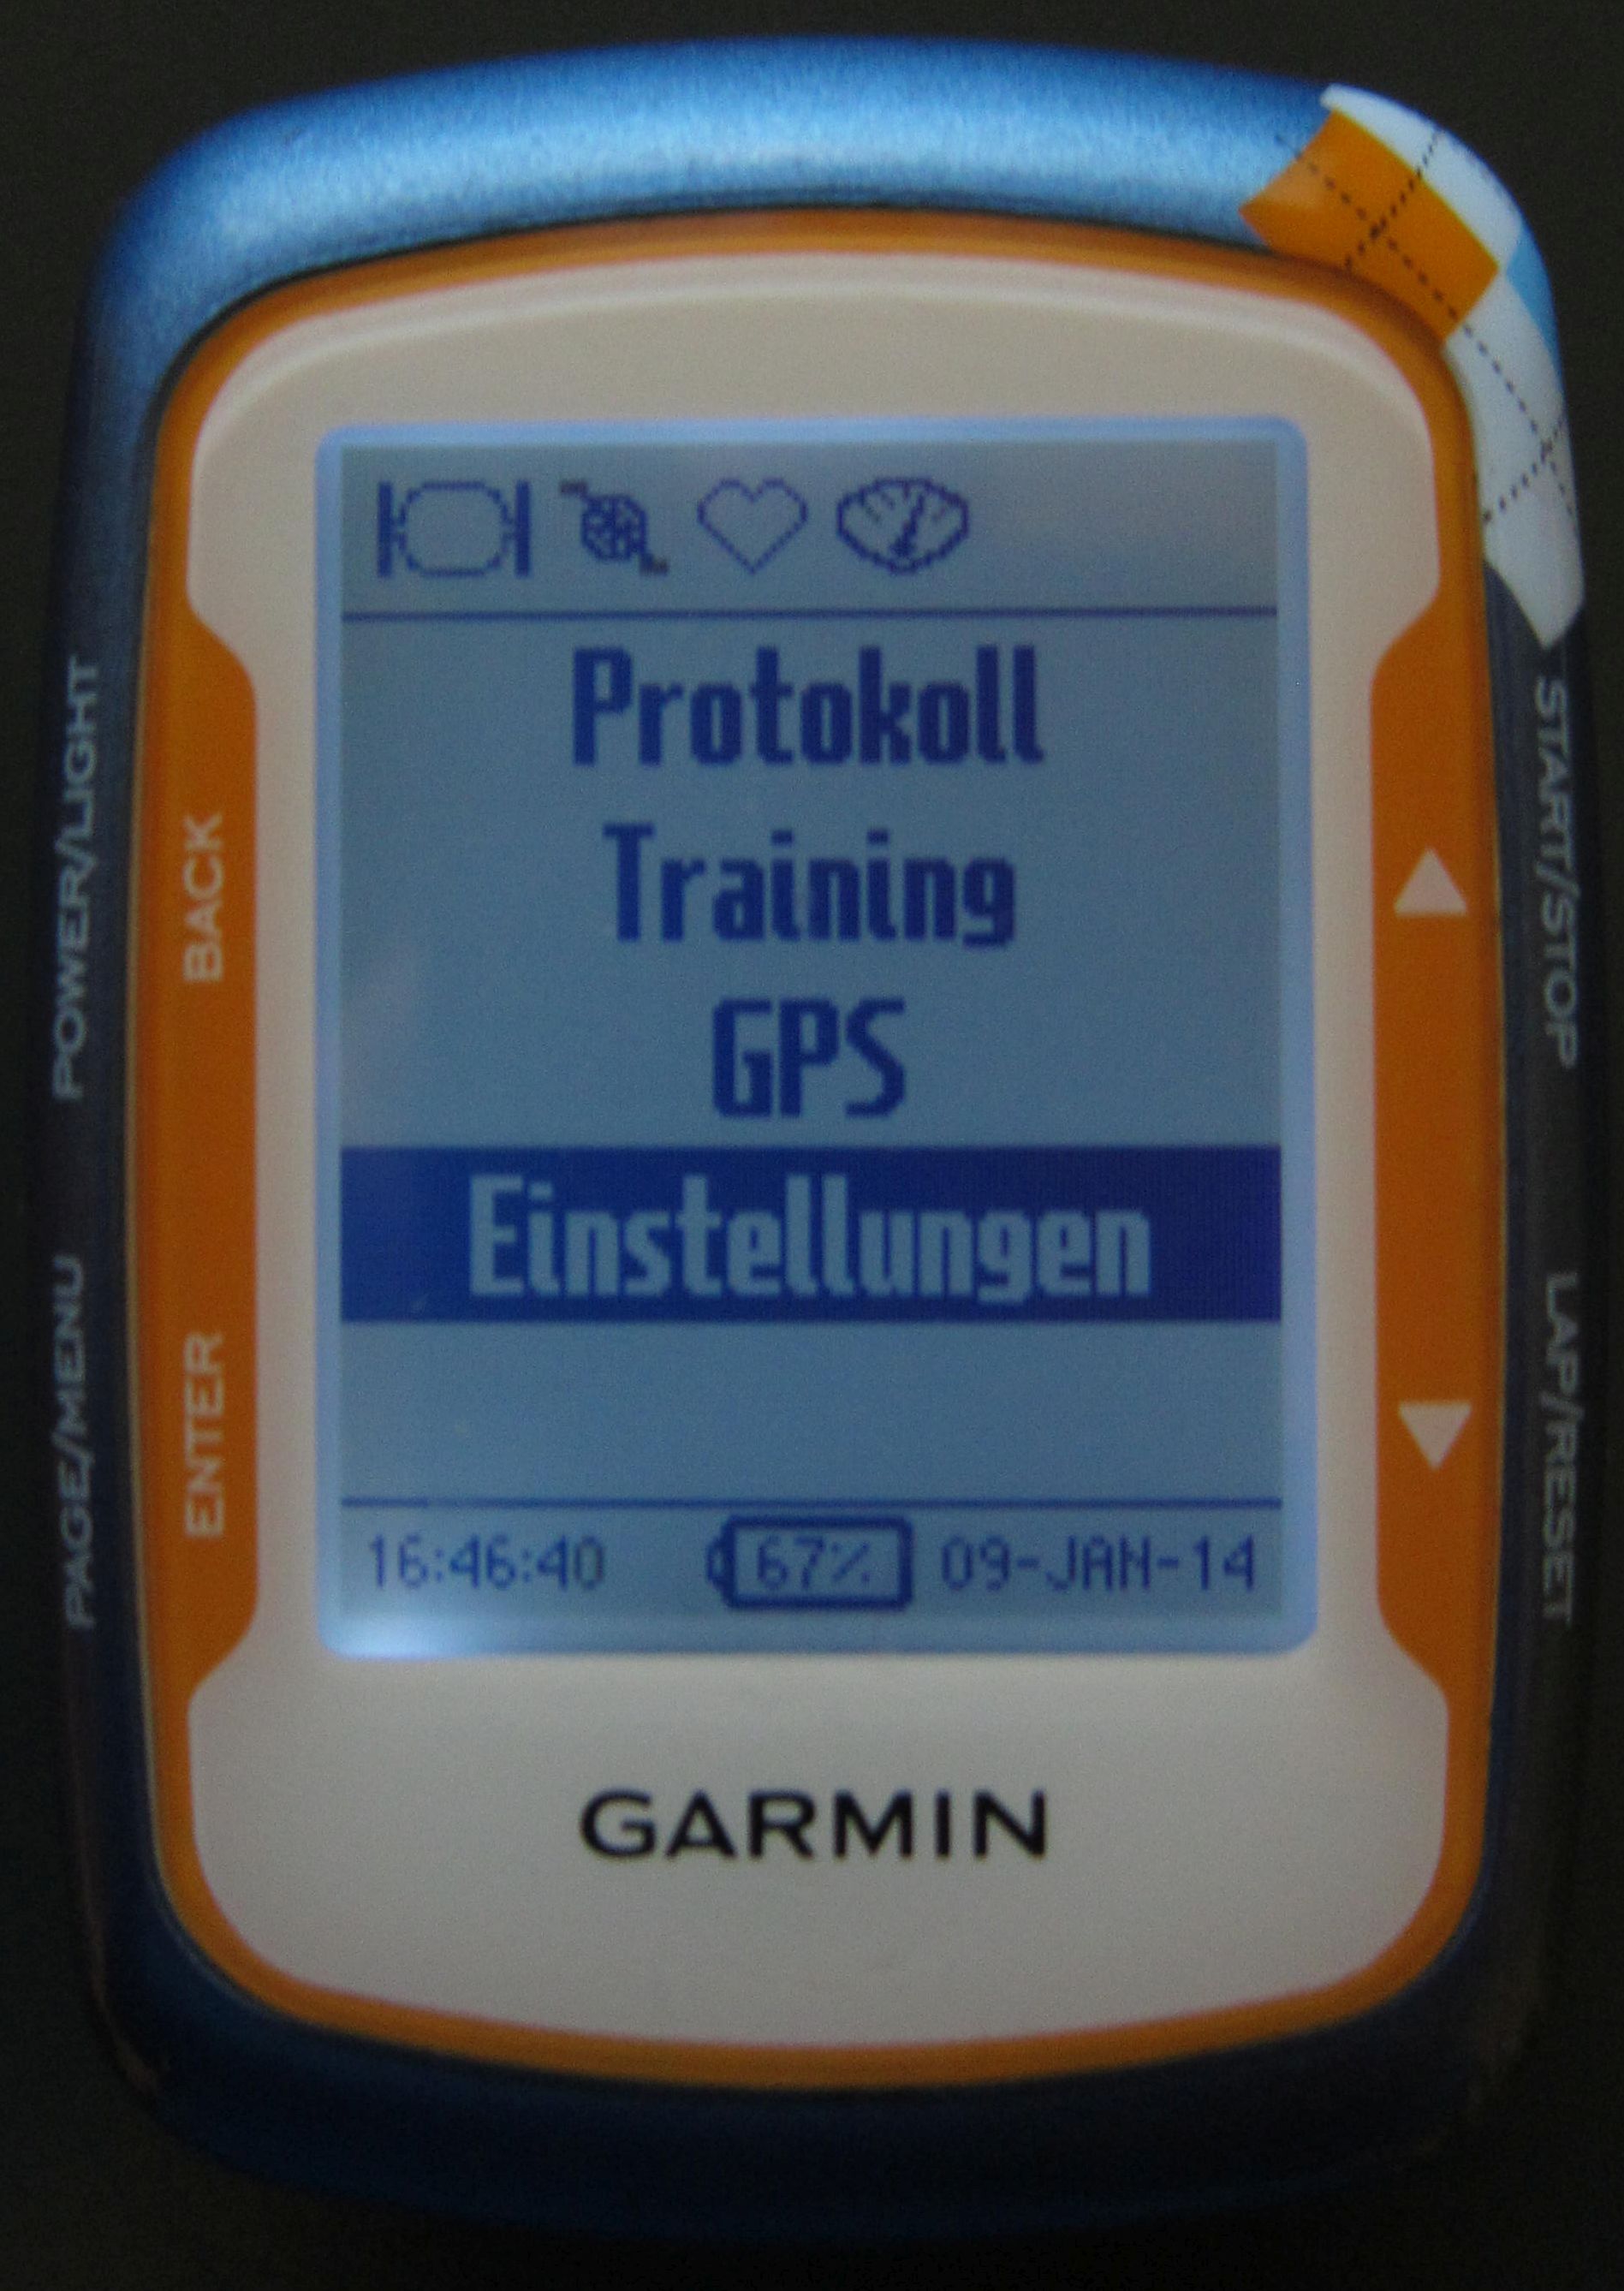
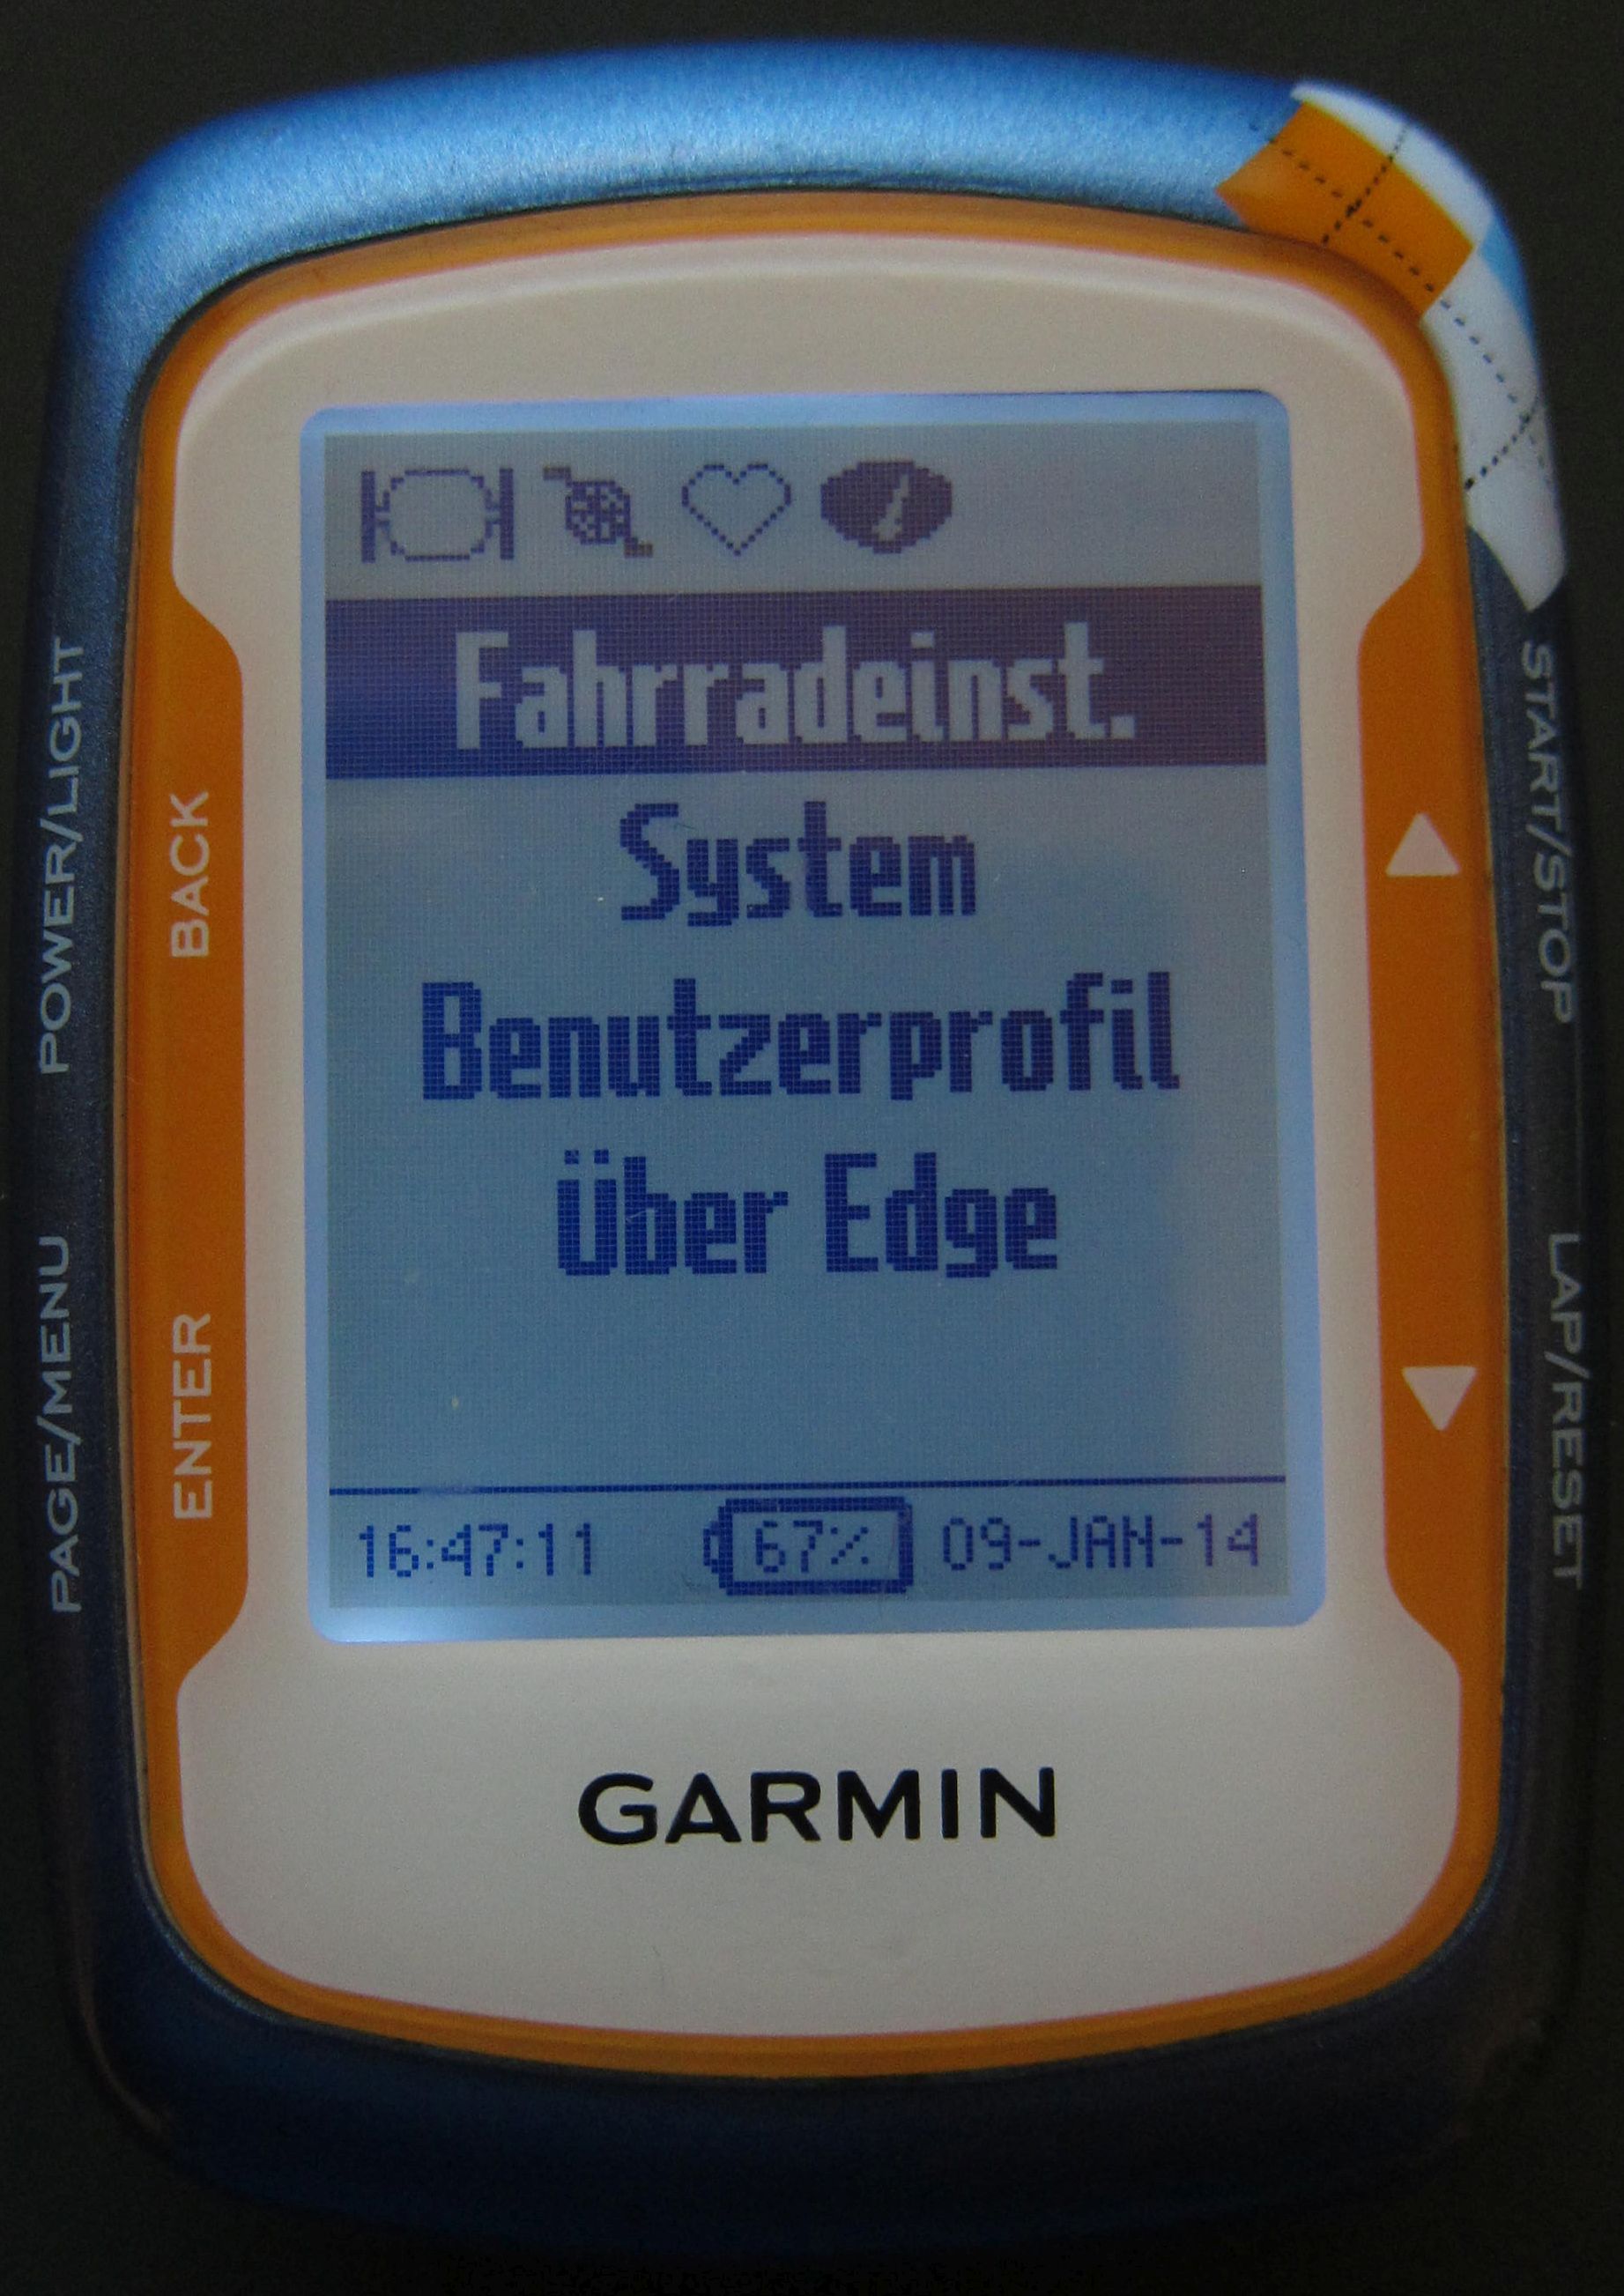
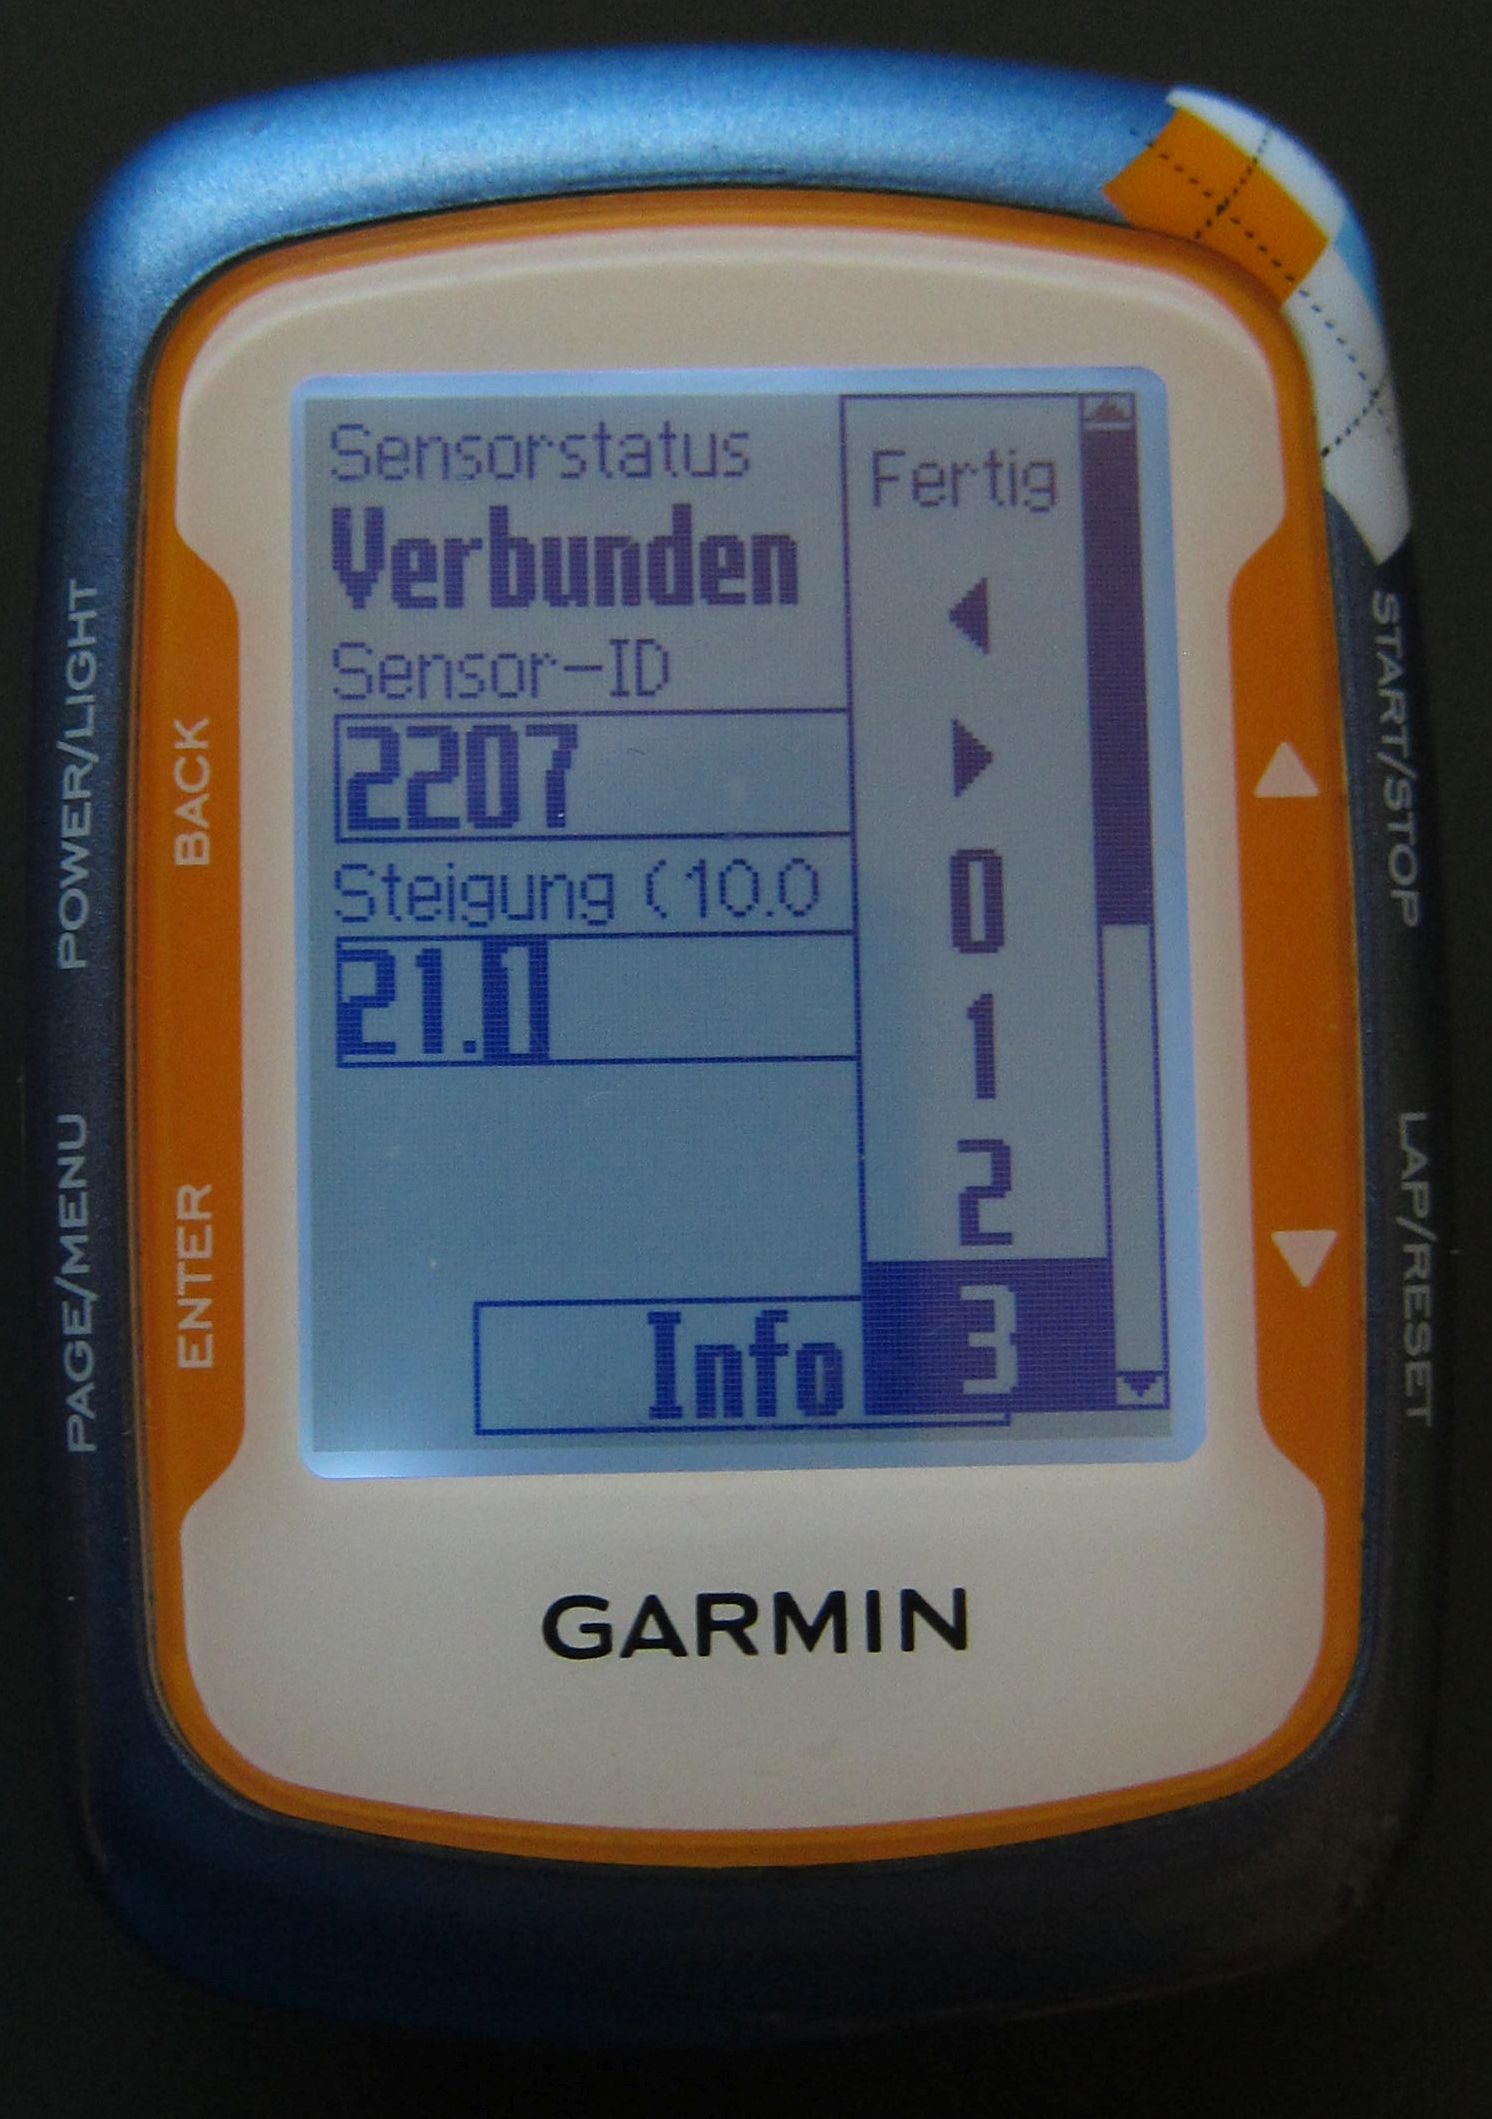
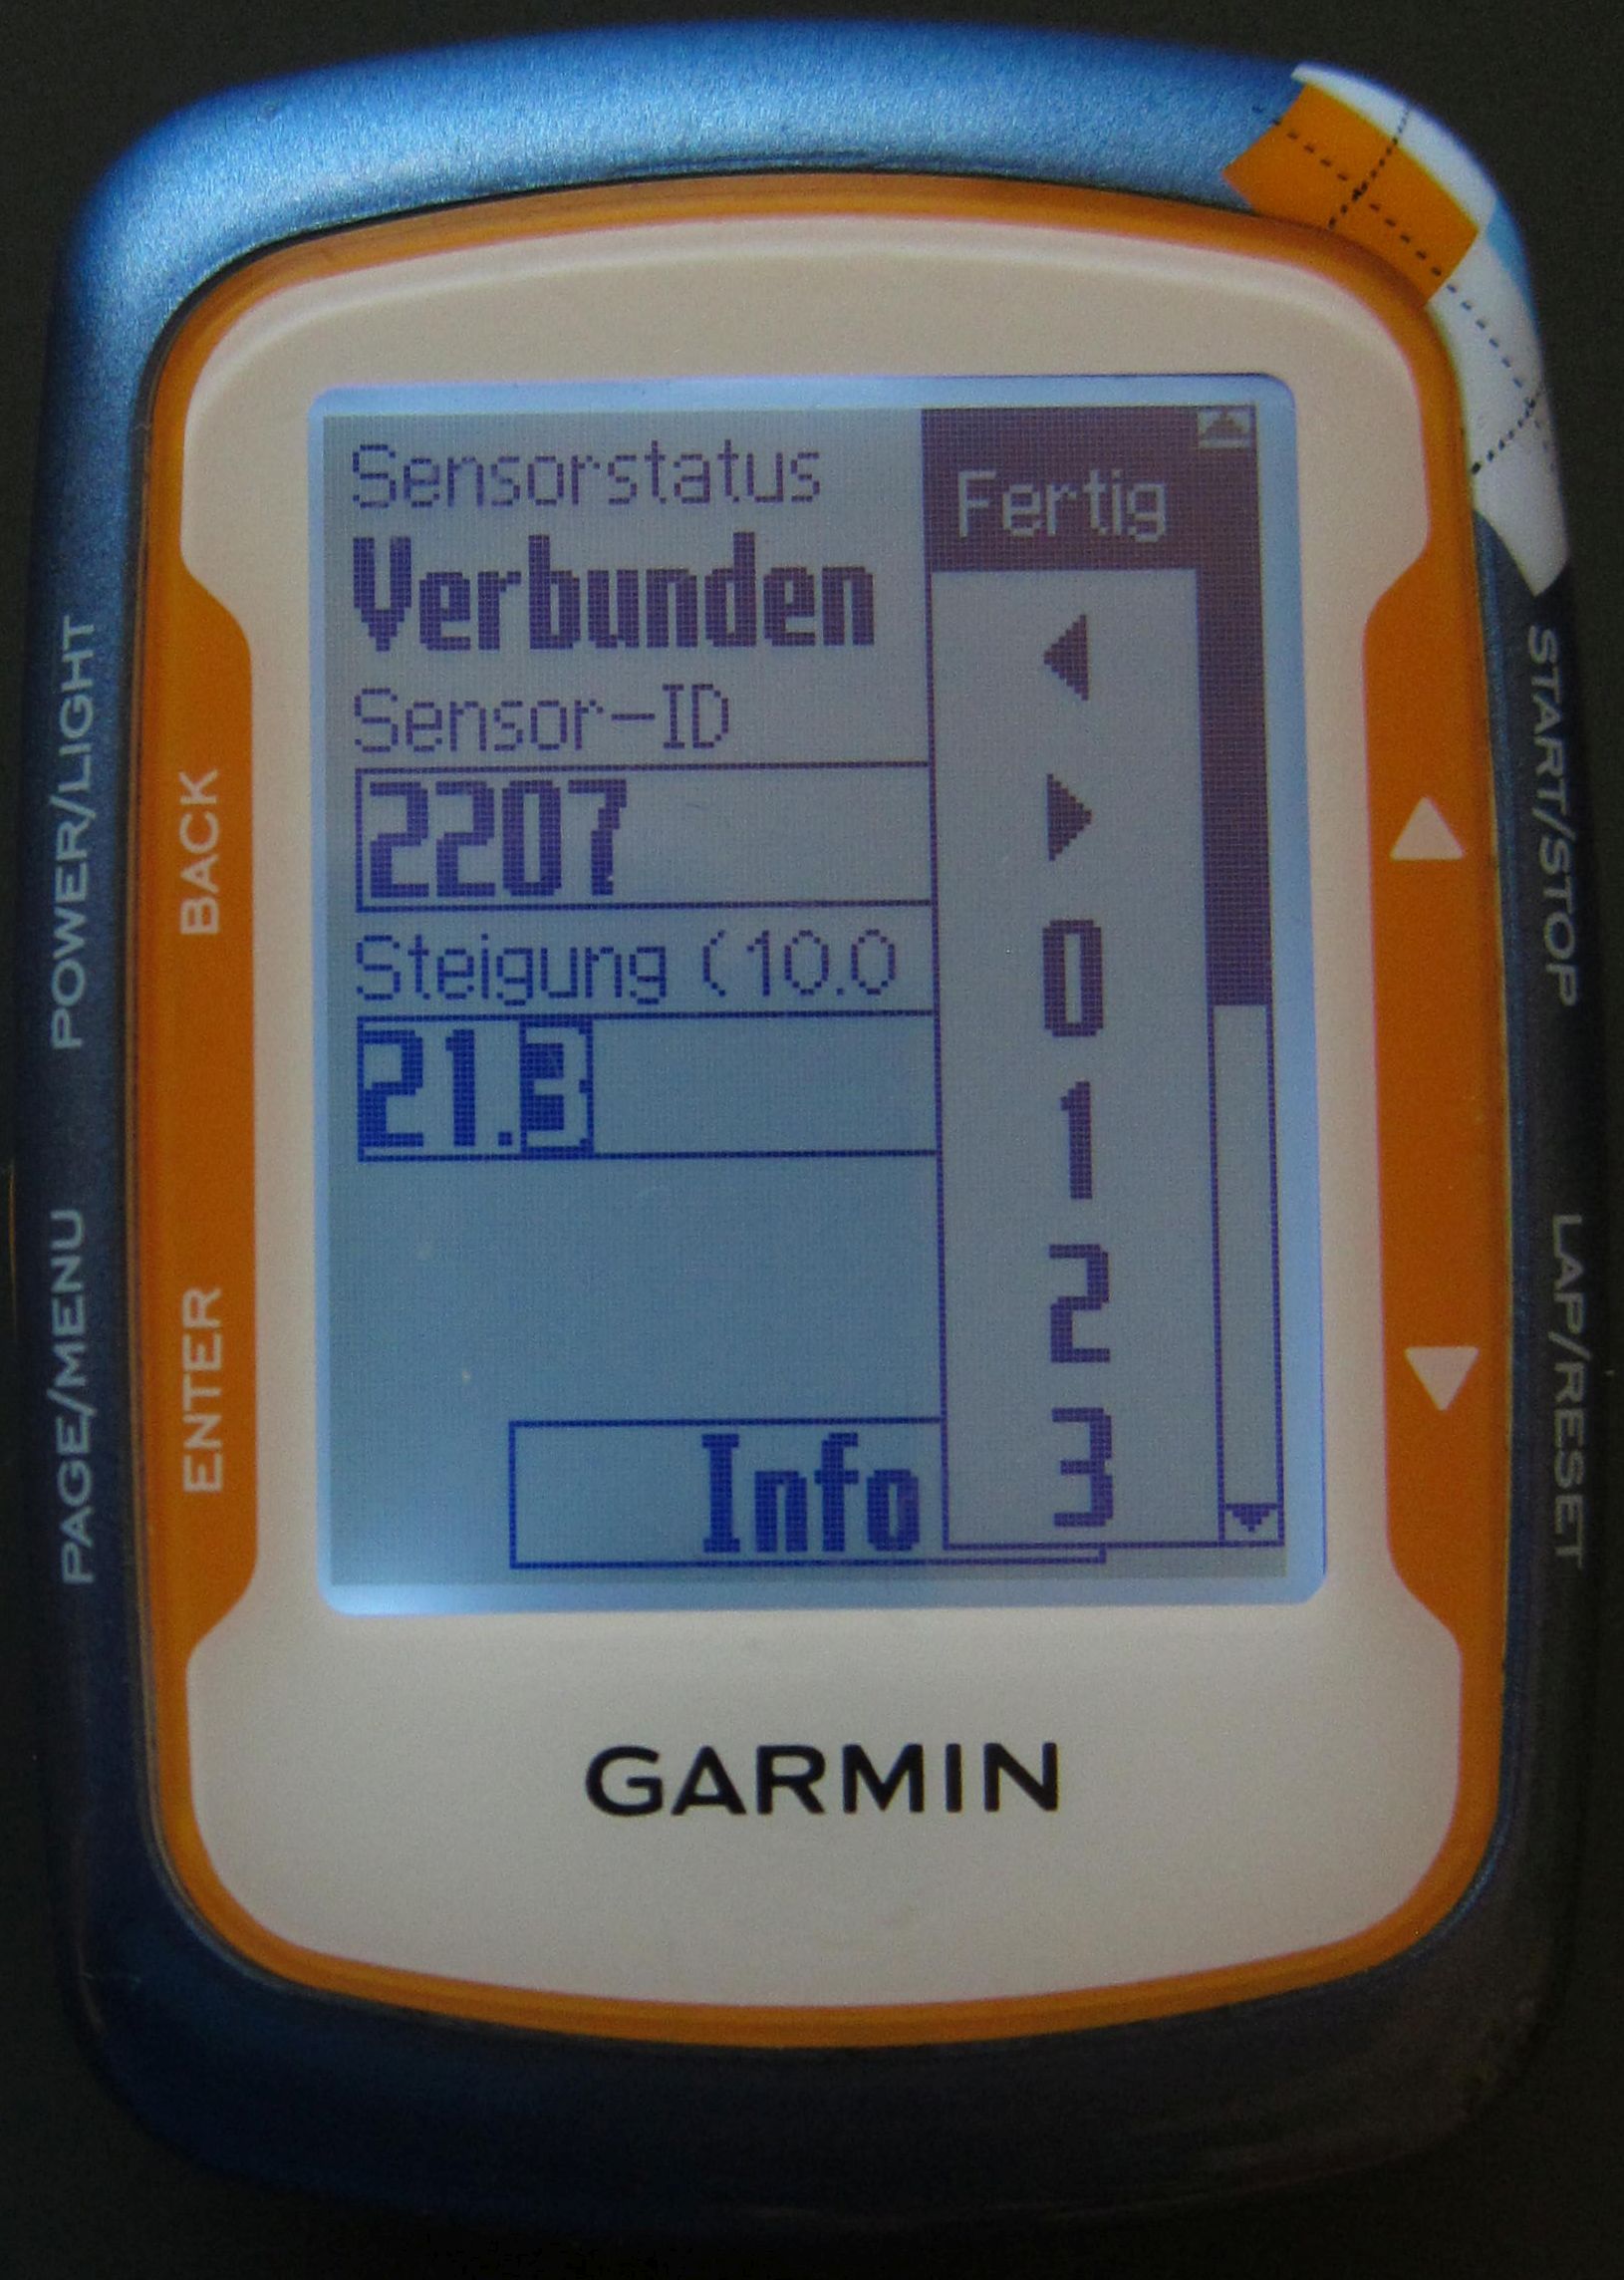
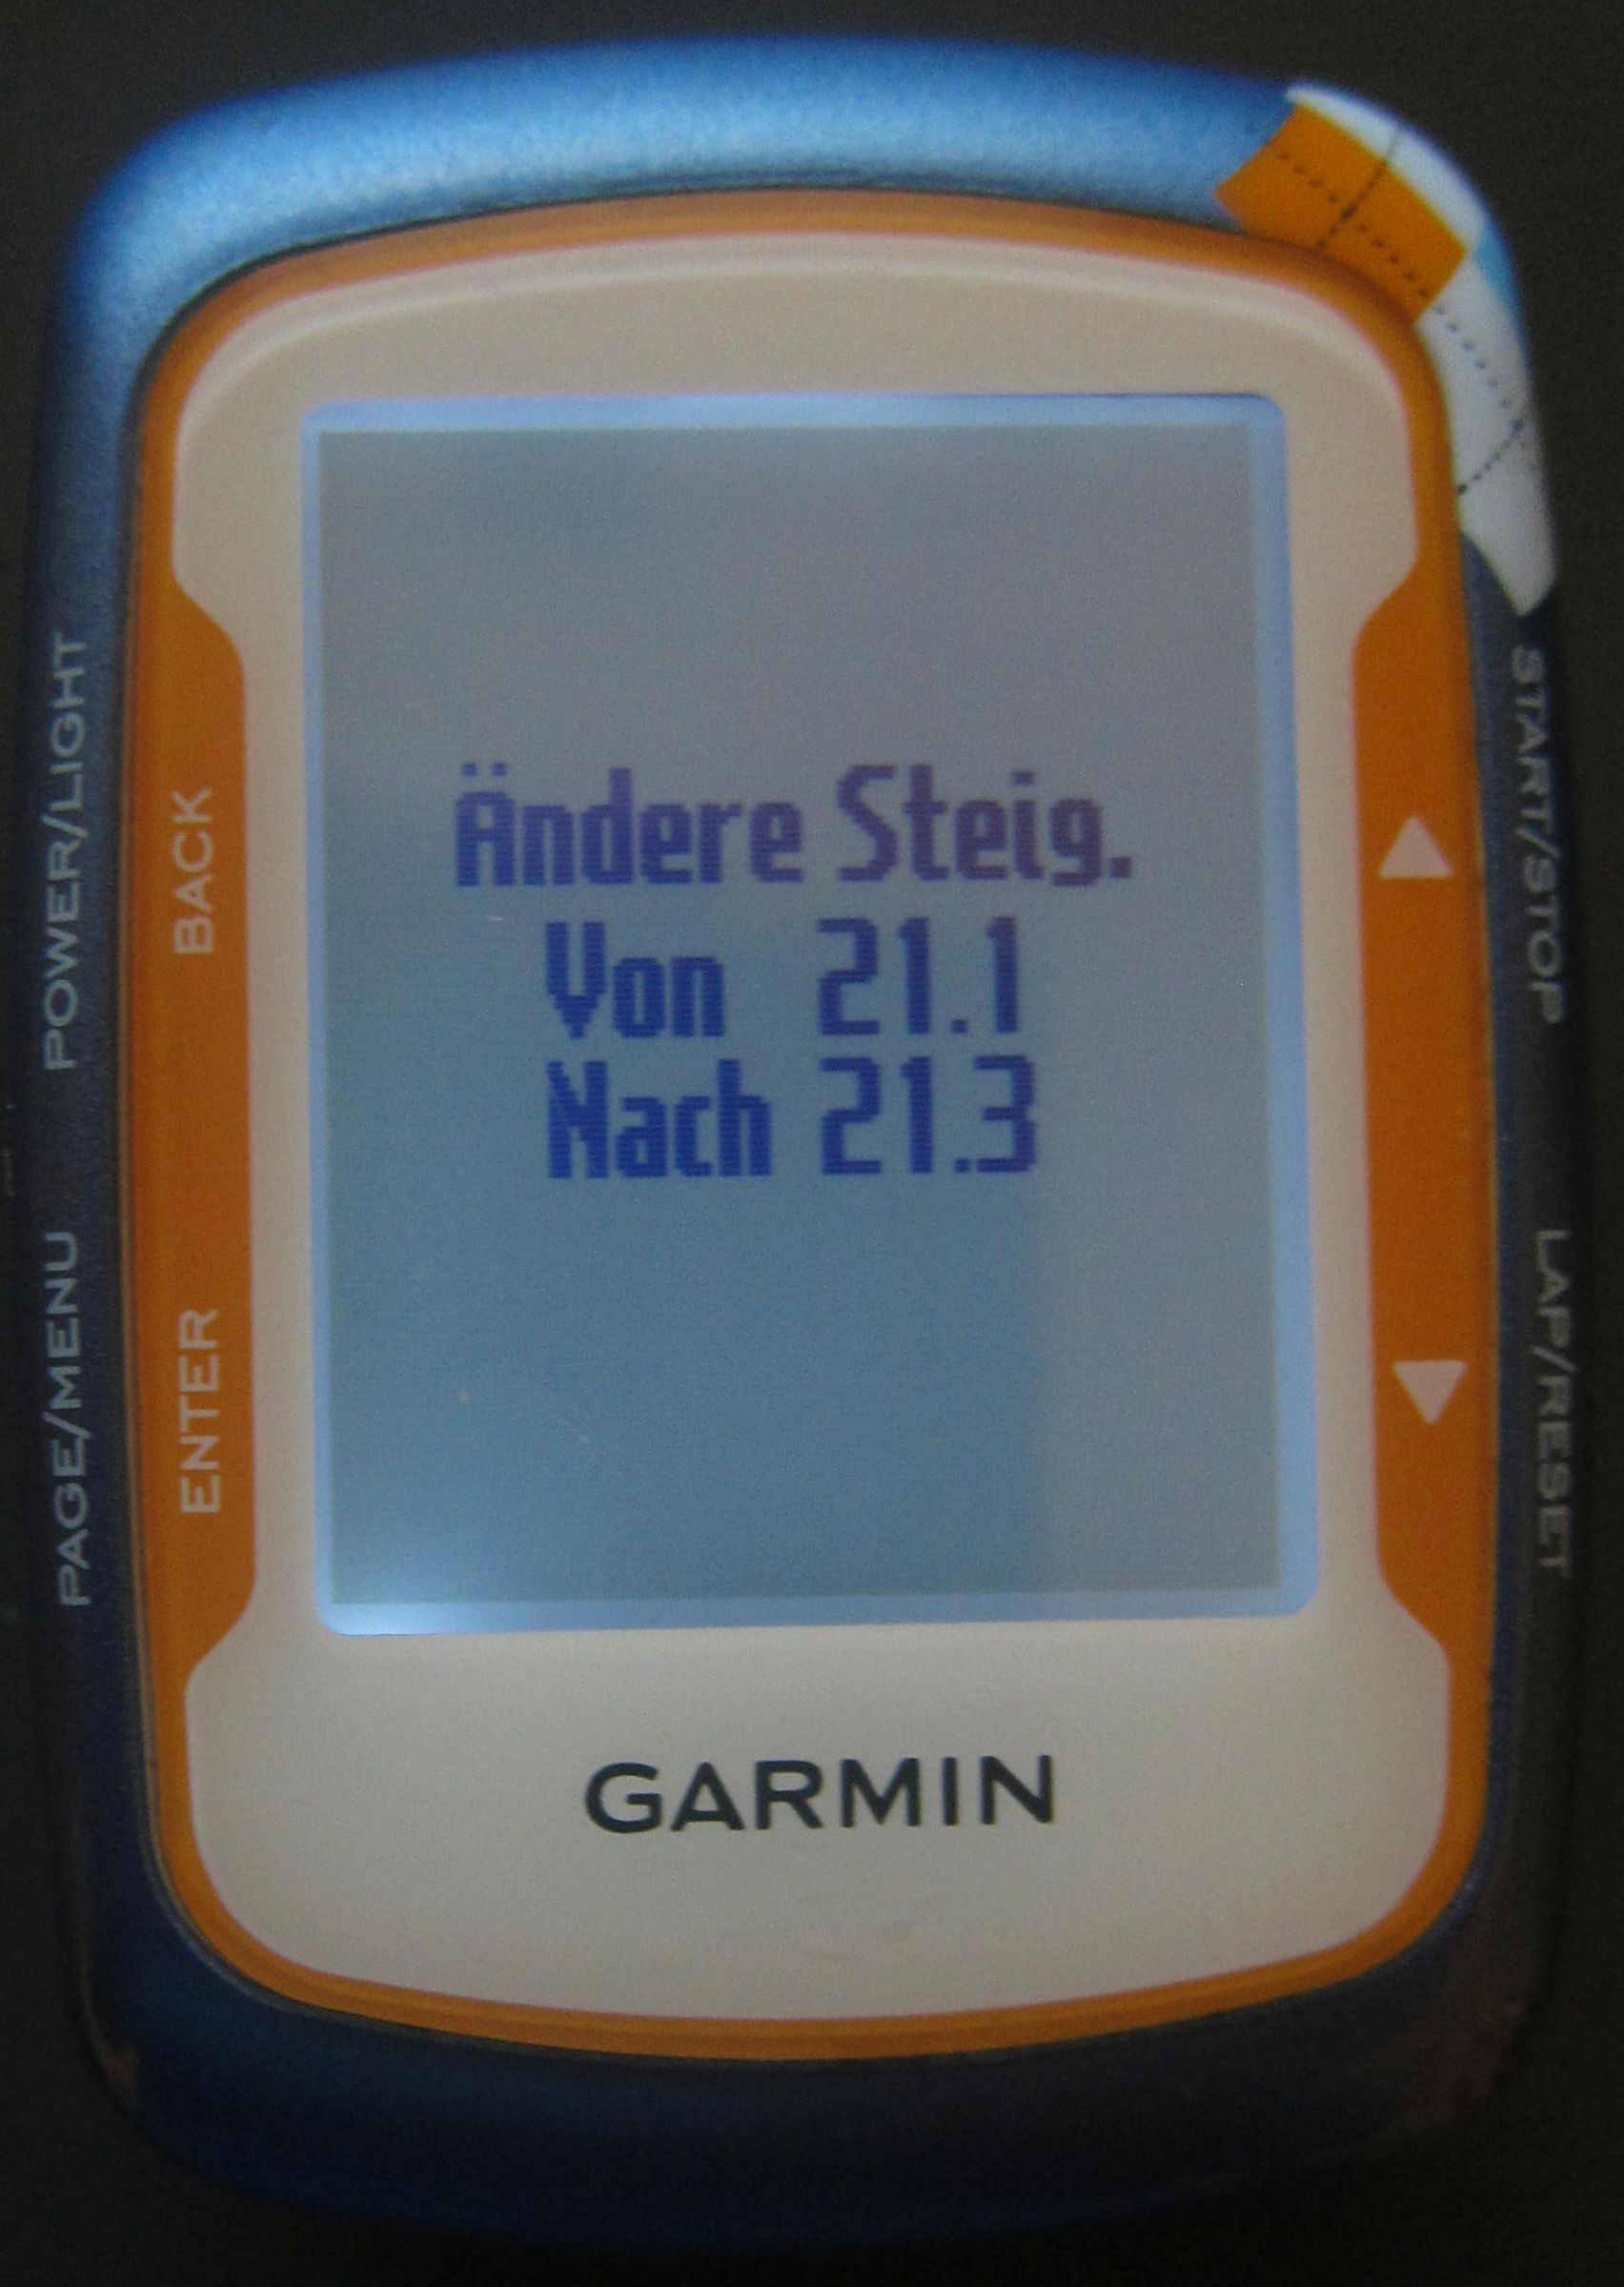
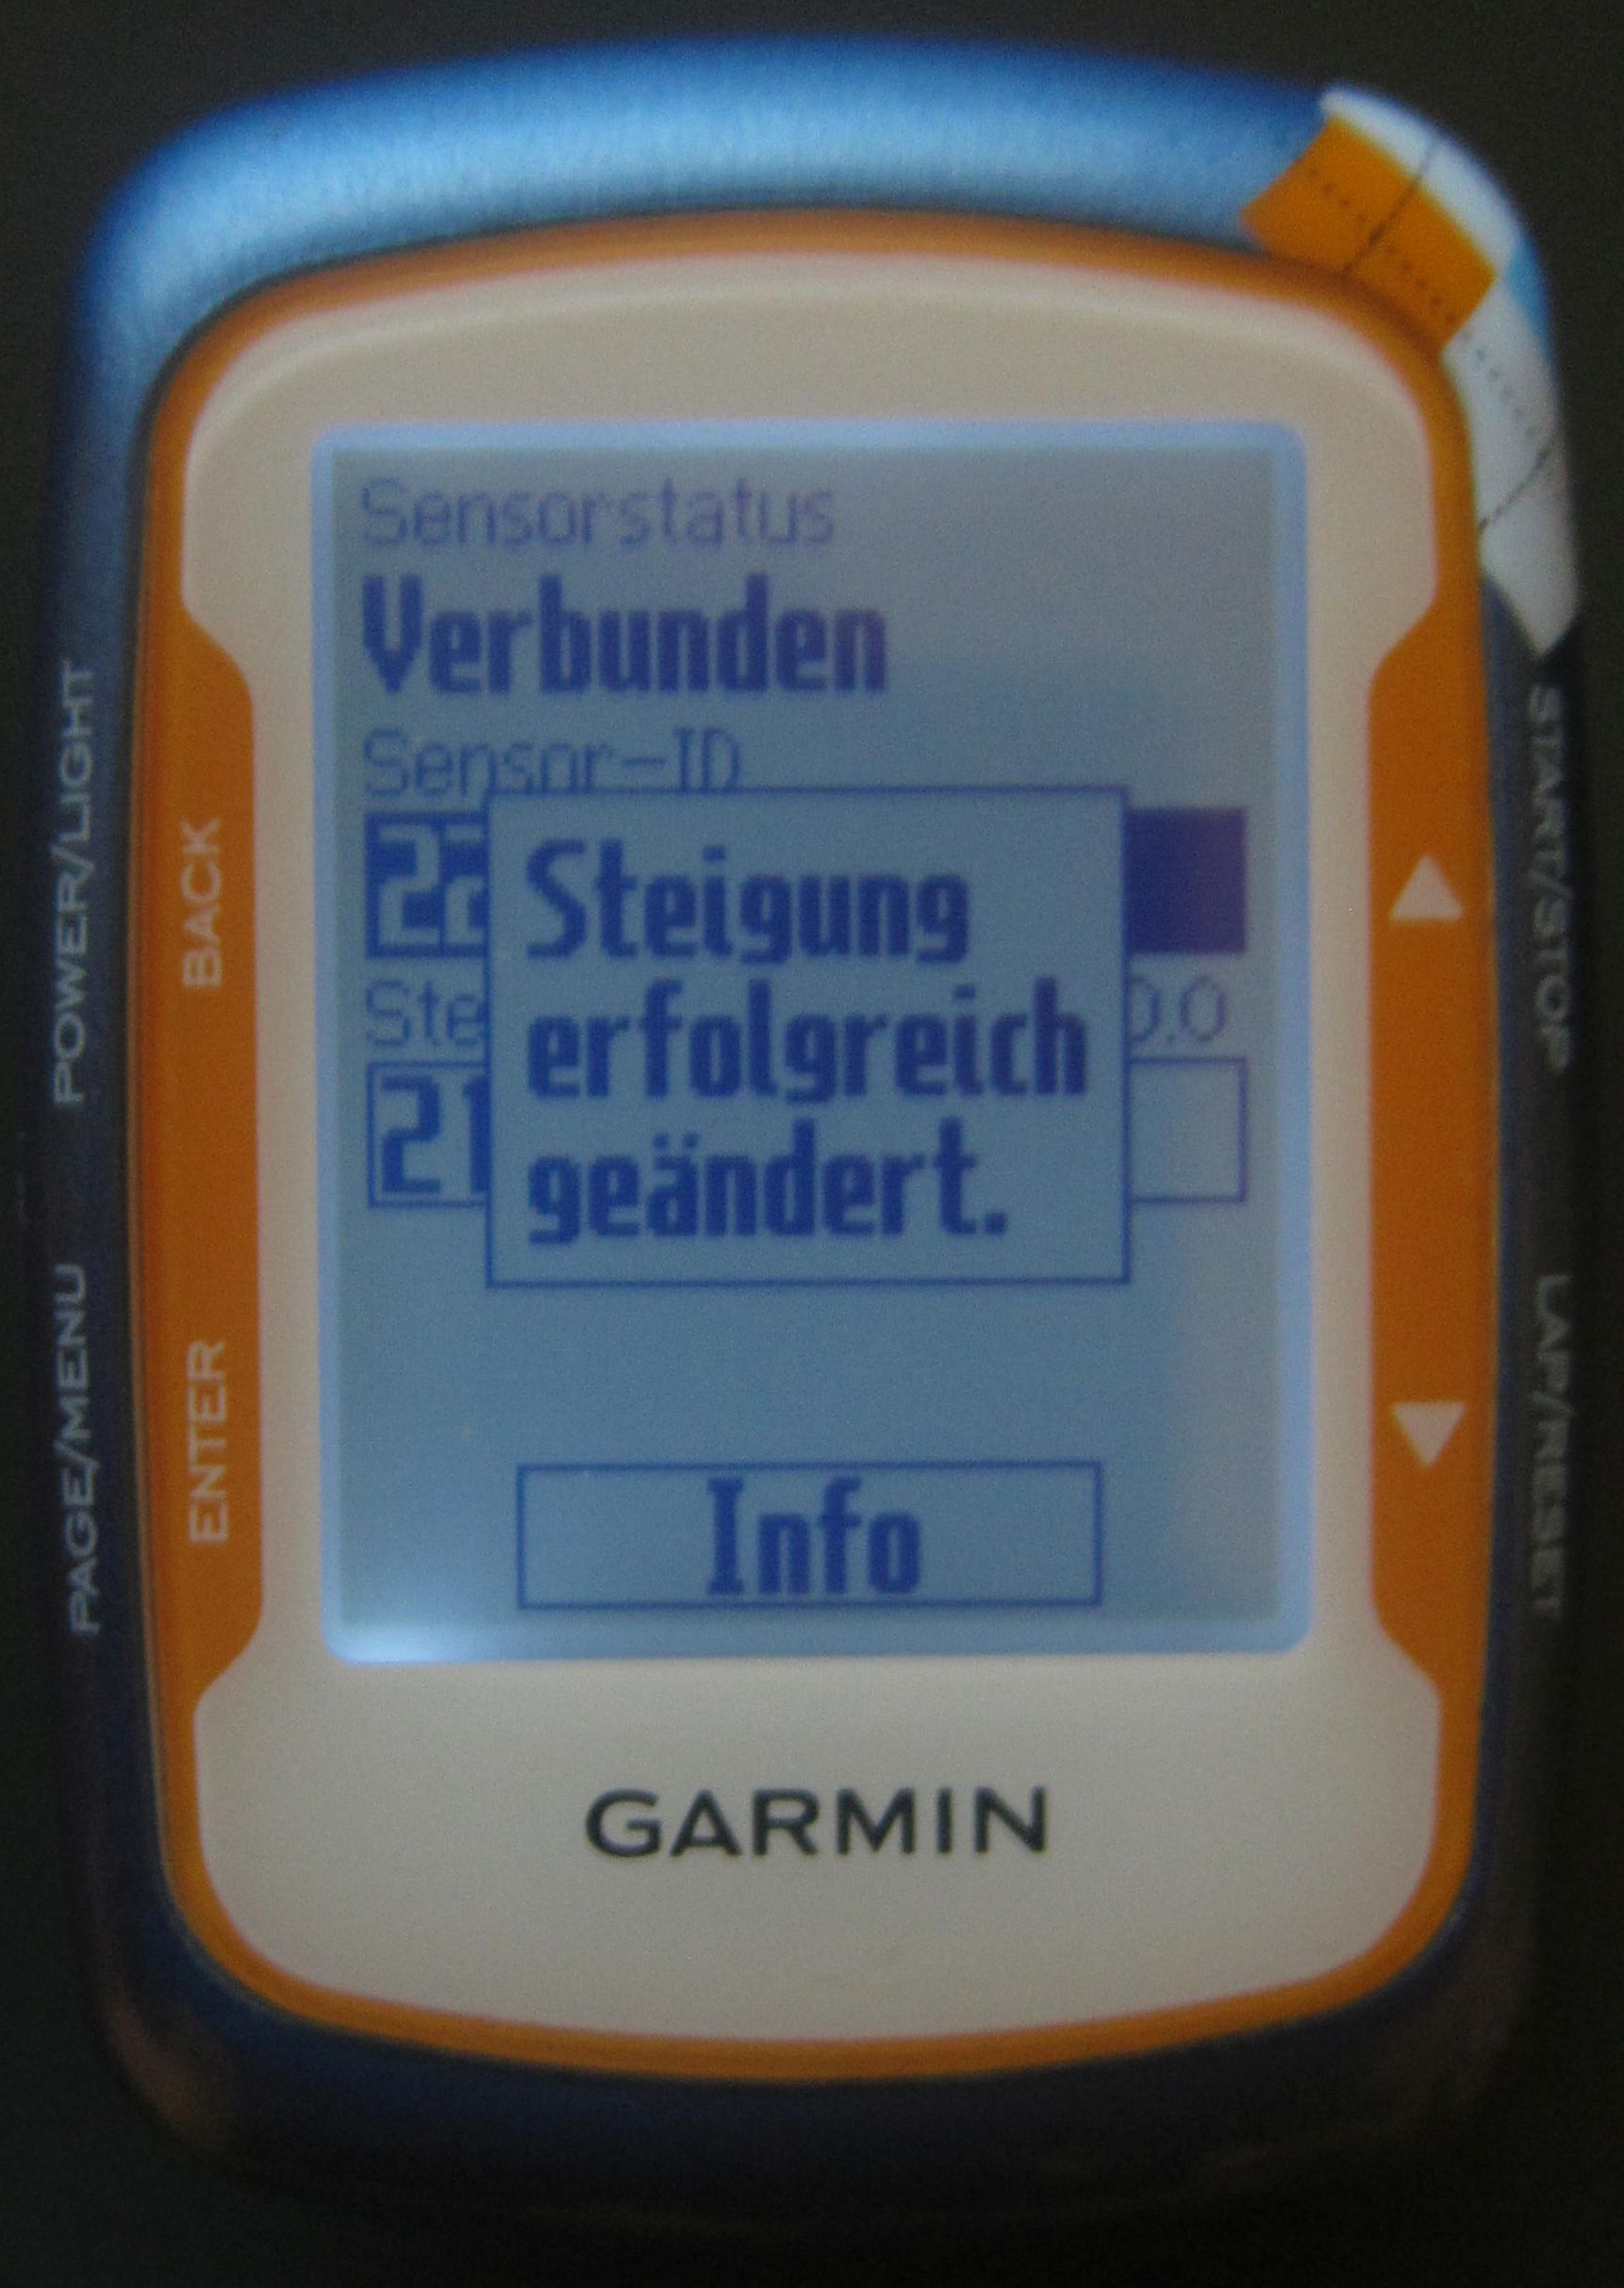
Die somit ermittelte spezifische Steigung muss dann noch im Powermeter gespeichert werden, damit sie korrekt an das entsprechende Aufzeichnungsgerät übertragen wird. Der Garmin Edge 500 Fahrradcomputer bietet genau diese Möglichkeit, die im Powermeter gespeicherte spezifische Steigung zu aktualisieren, sodass etwaige Änderungen der Steigung auch bei anderen Aufzeichnungsgeräten “ankommen”. In diesem kurzen Tutorial zeige ich, wie dieser Aktualisierungsprozess genau abläuft.

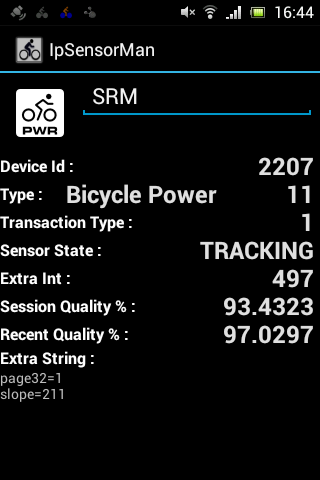
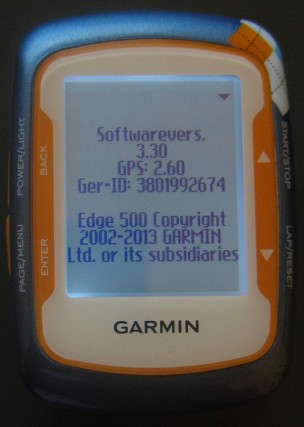
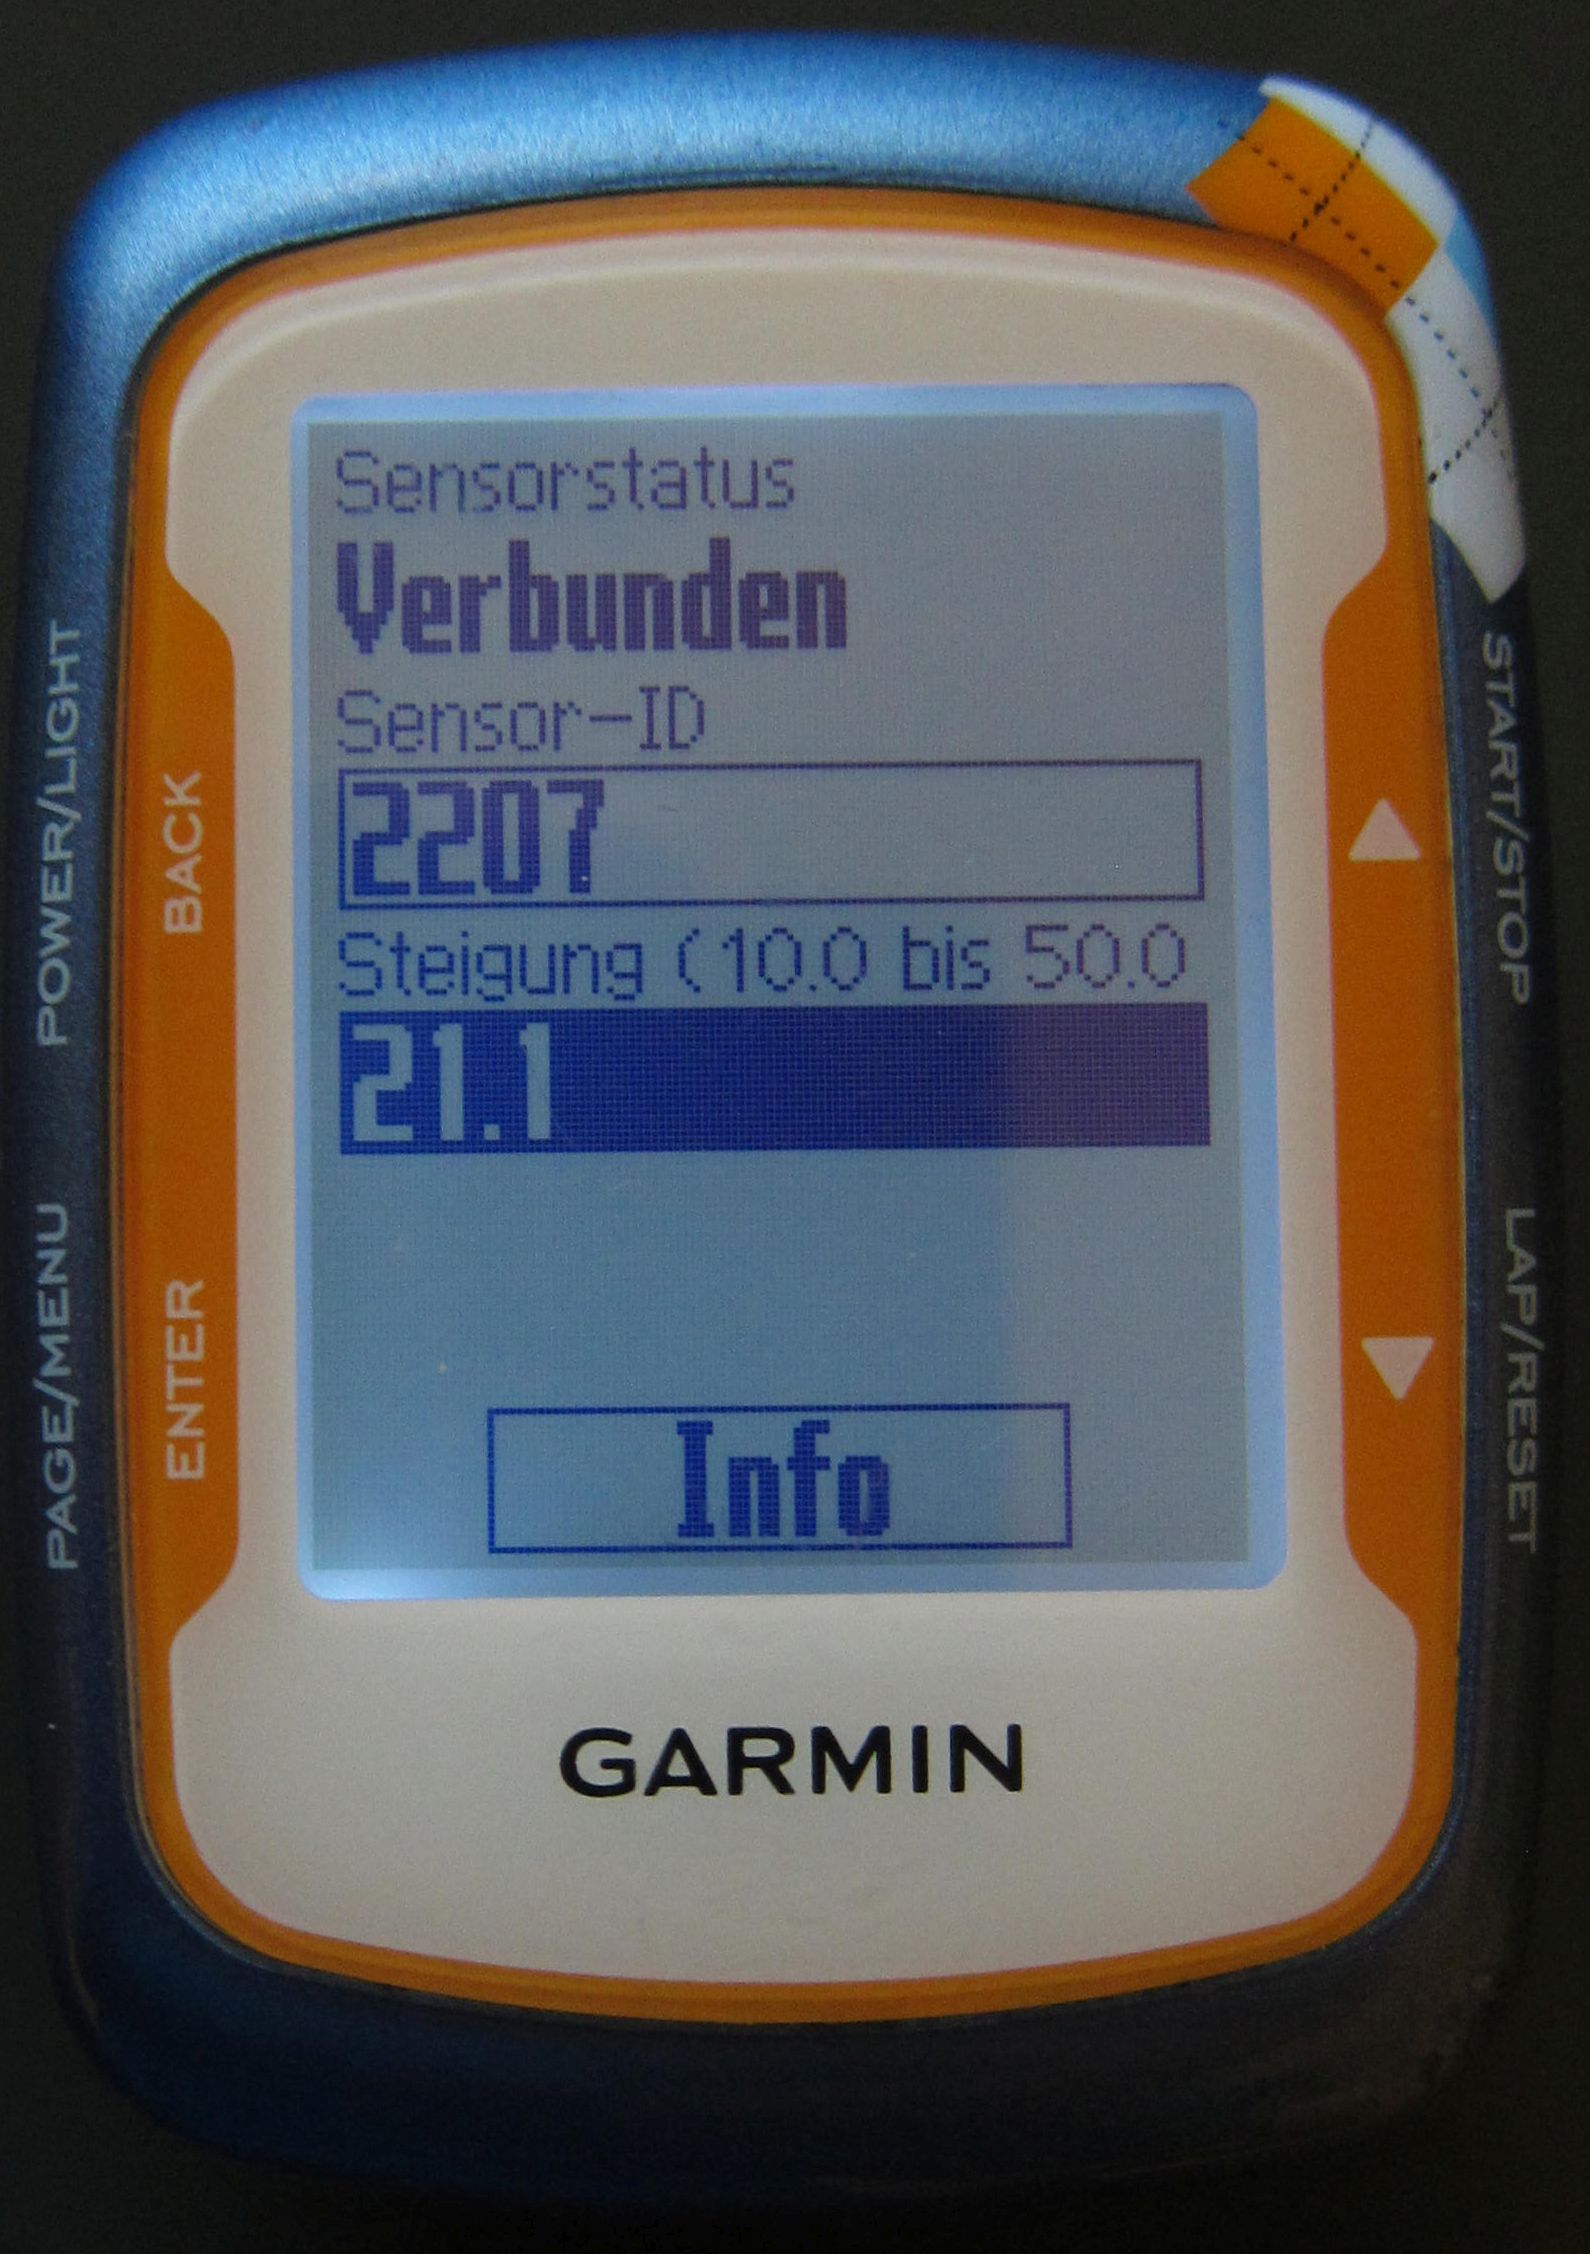
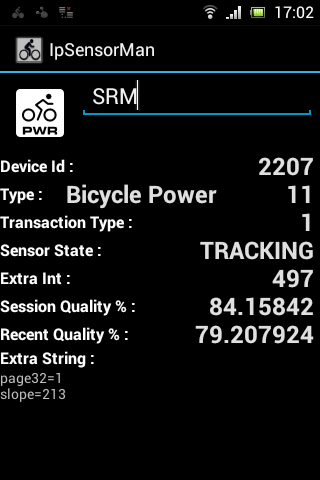
Im linken Bild ist der Ausgangszustand des Slope-Settings im Android-App “IpBike” dokumentiert, der Slope-Wert beträgt 21.1 (Im Screenshot die unterste Zeile). Zum updaten des Slope-Werts verwende ich einen Garmin Edge 500 mit der Firmware-Version 3.30. Wichtig ist, dass der Powermeter während des Update-Vorgangs nur mit dem Garmin Edge und nicht mit anderen Geräten verbunden ist, ansonsten kann es zu einer Fehlermeldung kommen.


20140109_SRM-Slope-Update_Garmin-Edge-500_0120140109_SRM-Slope-Update_Garmin-Edge-500_02

Zunächst den Garmin Edge einschalten, die Taste “Enter” lange drücken. Dann den Menüpunkt “Einstellungen” auswählen und die Taste “Enter” drücken (linkes Bild). Im nächsten Menü “Fahradeinst.” auswählen und wieder “Enter” drücken (rechtes Bild).

20140109_SRM-Slope-Update_Garmin-Edge-500_0320140109_SRM-Slope-Update_Garmin-Edge-500_04

Nun das relevante Fahrrad auswählen, in diesem Fall “Scott Plasma TT”, und dann die Taste “Enter” drücken (linkes Bild). Im nächsten Menü “ANT+ Leistung” auswählen und “Enter” drücken (rechtes Bild).

20140109_SRM-Slope-Update_Garmin-Edge-500_0520140109_SRM-Slope-Update_Garmin-Edge-500_06

Nun “Sensorinfos” auswählen und “Enter” drücken (linkes Bild). Dann “Steigung” auswählen und “Enter” drücken (rechtes Bild).

20140109_SRM-Slope-Update_Garmin-Edge-500_0720140109_SRM-Slope-Update_Garmin-Edge-500_08

Dann die Zahlenwerte eingeben (linkes Bild), abschließend “Fertig” auswählen und “Enter” drücken (rechtes Bild).

20140109_SRM-Slope-Update_Garmin-Edge-500_0920140109_SRM-Slope-Update_Garmin-Edge-500_10

Dann erscheint die Anzeige “Ändere Steig. Von XX.X Nach XX.X” (linkes Bild). Sofort Kurbel schnell vorwärts drehen. Die Trittfrequenz sollte >40 sein. Wenn der Update-Vorgang erfolgreich war, erscheint die Anzeige “Steigung erfolgreich geändert.”. Die Steigung wurde dann nicht nur im Garmin Edge, sondern auch im SRM Powermeter aktualisiert.

20140109_SRM-Slope-Update_Garmin-Edge-500_1120140109_SRM-Slope-Update_Garmin-Edge-500_12

Wenn die Kurbel während des Update-Vorgangs nicht schnell genug gedreht wurde, erscheint unter Umständen die Fehlermeldung “Slope change failed. Retry?”. In diesem Fall “Ja” auswählen und die Kurbel erneut drehen (linkes Bild). Abschließend habe ich den Powermeter mit meinem Smartphone (Sony Xperia Active) verbunden und den Sensorstatus mit dem App IpBike ausgelesen. Im Screenshot sieht man, das der Slope-Wert vom Powermeter übernommen und korrekt an das App übergeben wurde.

20140109_SRM-Slope-Update_Garmin-Edge-500_1420140109_SRM-Slope-Update_Garmin-Edge-500_15

Improved version: Aerobar Computer Mount for Garmin Edge

About one year ago, I published a post about a custom aerobar computer mount for the Garmin quarter turn mount.

After using it for one year, I was satisfied with the solution except for one thing: The computer used to tilt forward while riding due to the fact that I did use only one zip tie on each side. To fix this, I manufactured an improved design over the weekend which employs two zip ties on each side.

It starts with a plate of nude carbon with a thinkness of 1.4mm.

I printed out the layout of the computer mount and glued it onto the carbon plate.

Using a Proxxon cutting machine, first I cut out the outer shape.

After that, I cut out the inner recessions on both sides.

Next, I drilled four holes for the zip ties and one more hole to keep the barometric sensor uncovered.

As the last cutting step, I roughly cut out the inner shape of the Garmin mount.

After some filing, the final result looked like this:

Contrary to the previous version, I don’t need the original Garmin mount any more – hence no gluing involved. The Garmin Edge series directly mounts into the carbon plate. From the back, it looks like that:

The total weight including for zip ties is 3g – this is 4g less than the original Garmin mount.

Mounted to the extensions, the holder looks like that. The next time I’ll renew the bar wrap I’ll hide the zip ties beneath the wrap.

Garmin Edge 500 mounted to the extensions and ready to display some serious power numbers ;-).

The computer is sitting flush to the extensions.

I am quite sure that the tilting issue is fixed by this new and improved version.

Aerobar Computer Mount for Garmin Edge

Update April 2013: There is an improved version of this custom Aerobar Computer Mount – please read this post for more details.

There are several options to mount a Garmin Edge cycling computer on a standard road bike. However, on a triathlon bike, things are not that easy. You could mount the computer on your stem – however, this option is not compatible with bottles mounted between the arms which is the most aerodynamic solution. Another option would be to mount the computer on one of the extensions. Yet, this would be a poor choice in terms of visibility. There is a quite exhaustive thread in the Slowtwitch forum which discusses several options and custom made solutions. I want to share mine ;-).

I took a carbon fiber plate and marked an octagon shape on it.

This was put into a standard bench vice.

The easiest method to cut straight lines into carbon fiber is to use a Proxxon / Dremel machine with a cutting wheel.

In approximately three minutes, the cuts were made.

The next step was to drill two holes each on the left and the right side to accomodate the cable ties.

Afterwards, I took a standard Garmin Bike Mount. However, the extensions of the mount to fit the rubber ties are somewhat redundant.

So I removed them, again with the Proxxon and a cutting wheel.

The result after a couple of minutes – pretty slick.

The trimmed down Garmin Mount will be glued on the carbon fibre plate.

The final mount after gluing.

Mounted between the shifters at the front end of the extensions using two cable ties.

And with my Garmin Edge 500 placed in the mount.

Just on one level with the top end of the extensions.

The weight of the bike mount including the cable ties is just 1g more than the standard Garmin mount including the rubber ties.

In total, it took me about 60 minutes to build the computer mount and I am confident that this is going to be a durable and well working solution.